Starting the CLI
Launch the interactive CLI from your terminal:Main Menu
When you launch the CLI, you’ll see the main menu: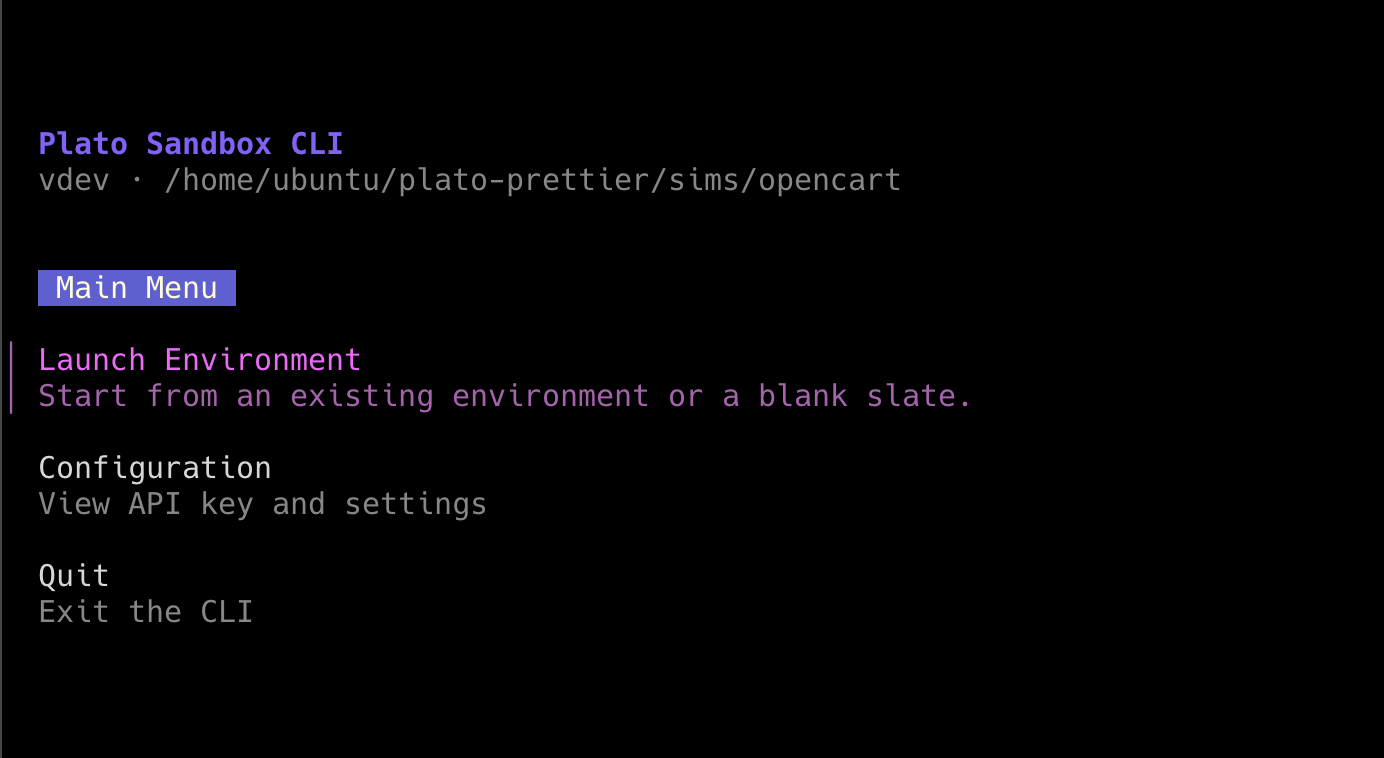
- Launch Environment - Create or resume a virtual machine
- Configuration - View API key and settings
- Quit - Exit the CLI
Creating a Virtual Machine
Select “Launch Environment” to begin. You have three options for creating a VM:Option 1: Blank VM (Manual Configuration)
Configure VM resources through interactive prompts: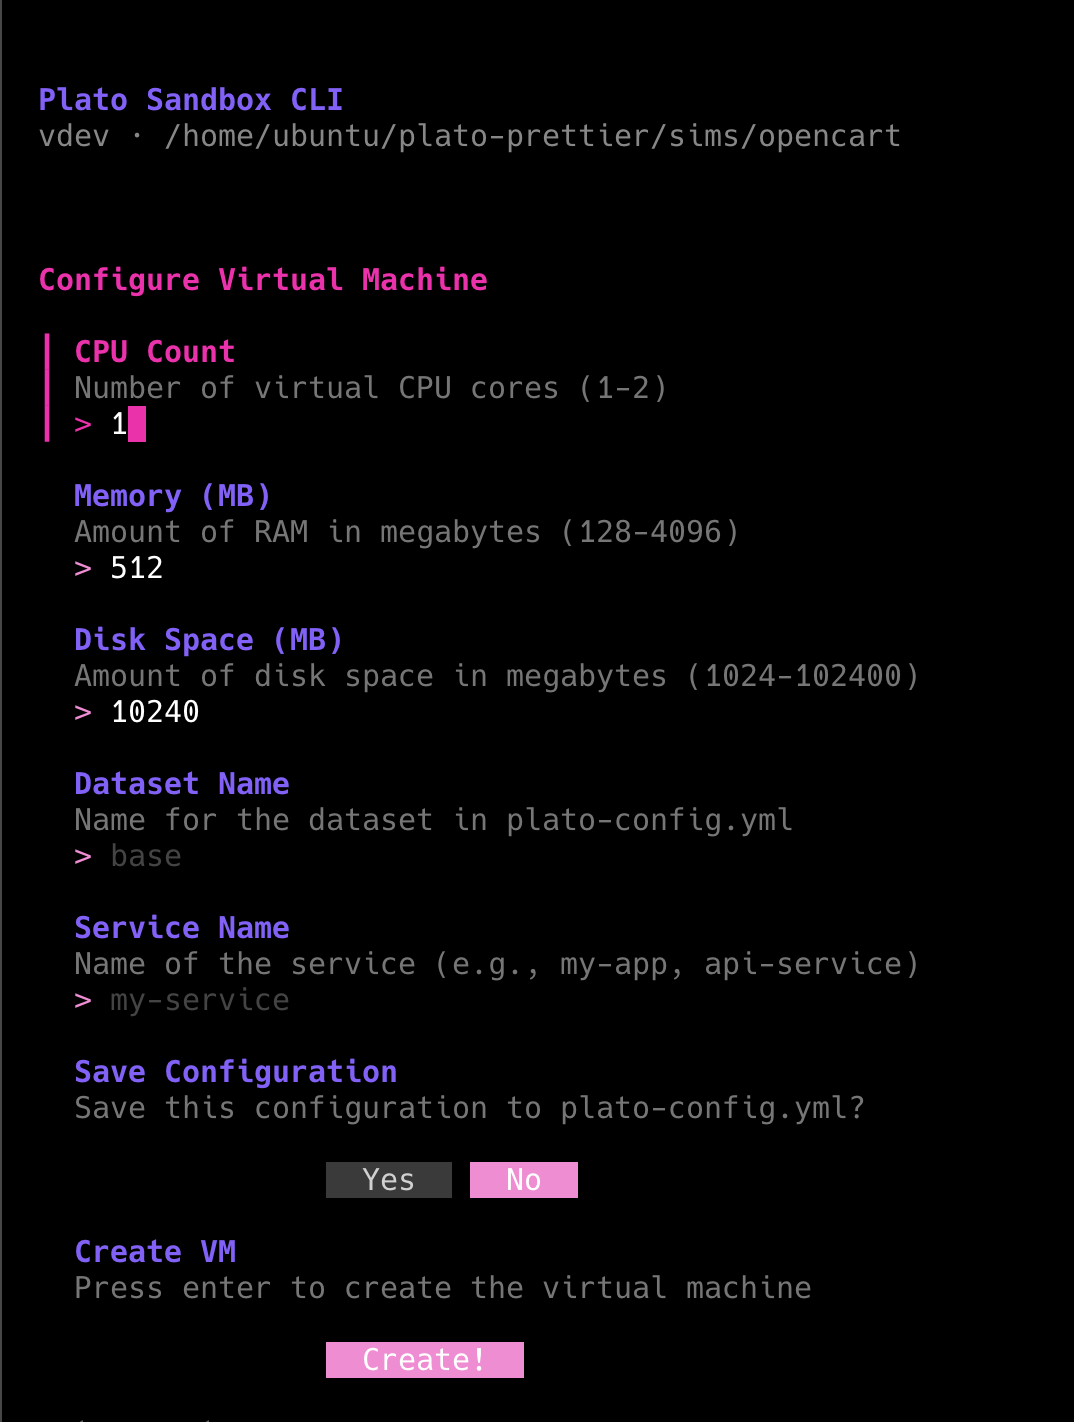
- CPU Count - Number of virtual CPUs (1-2)
- Memory (MB) - RAM allocation (128-4096 MB)
- Disk Space (MB) - Storage allocation (1024-102400 MB)
- Dataset Name - Name for the dataset in plato-config.yml
- Service Name - Name of the service (e.g., my-app, api-service)
- Save Configuration - Optionally save to plato-config.yml
Option 2: From plato-config.yml
If you have aplato-config.yml file in your current directory, the CLI will automatically detect it and offer to use that configuration. This is the recommended approach for existing simulators.
Option 3: From Existing Simulator
Browse and select from available simulators:
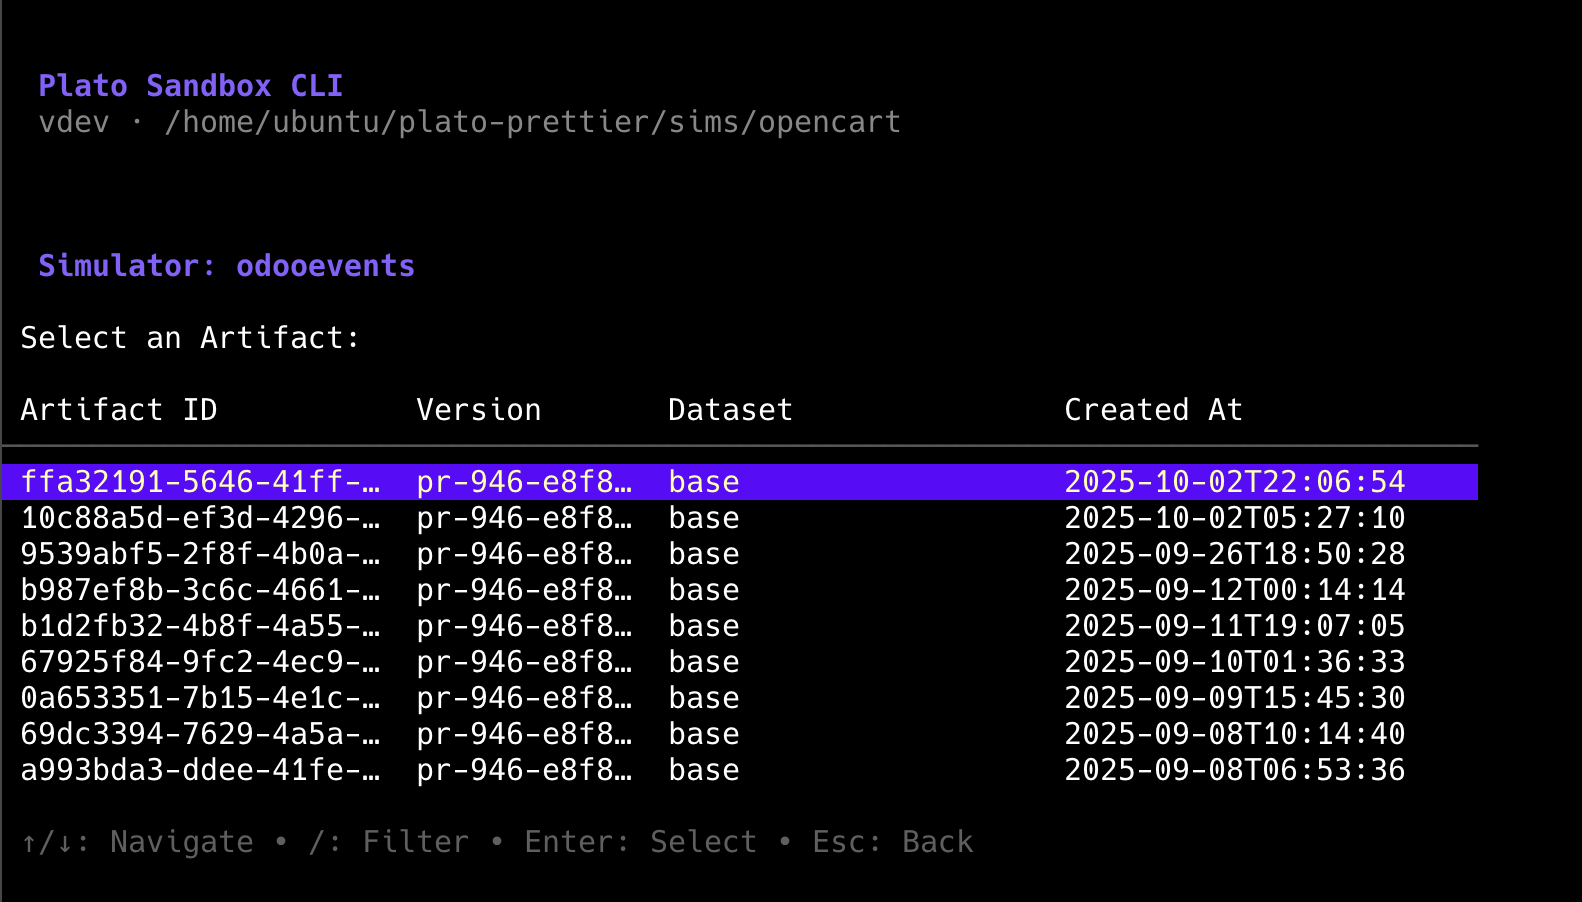
- Resume development from a previous state
- Test specific versions
- Deploy production snapshots
Virtual Machine Management
Once your VM is created, you’ll see the Virtual Machine Management screen: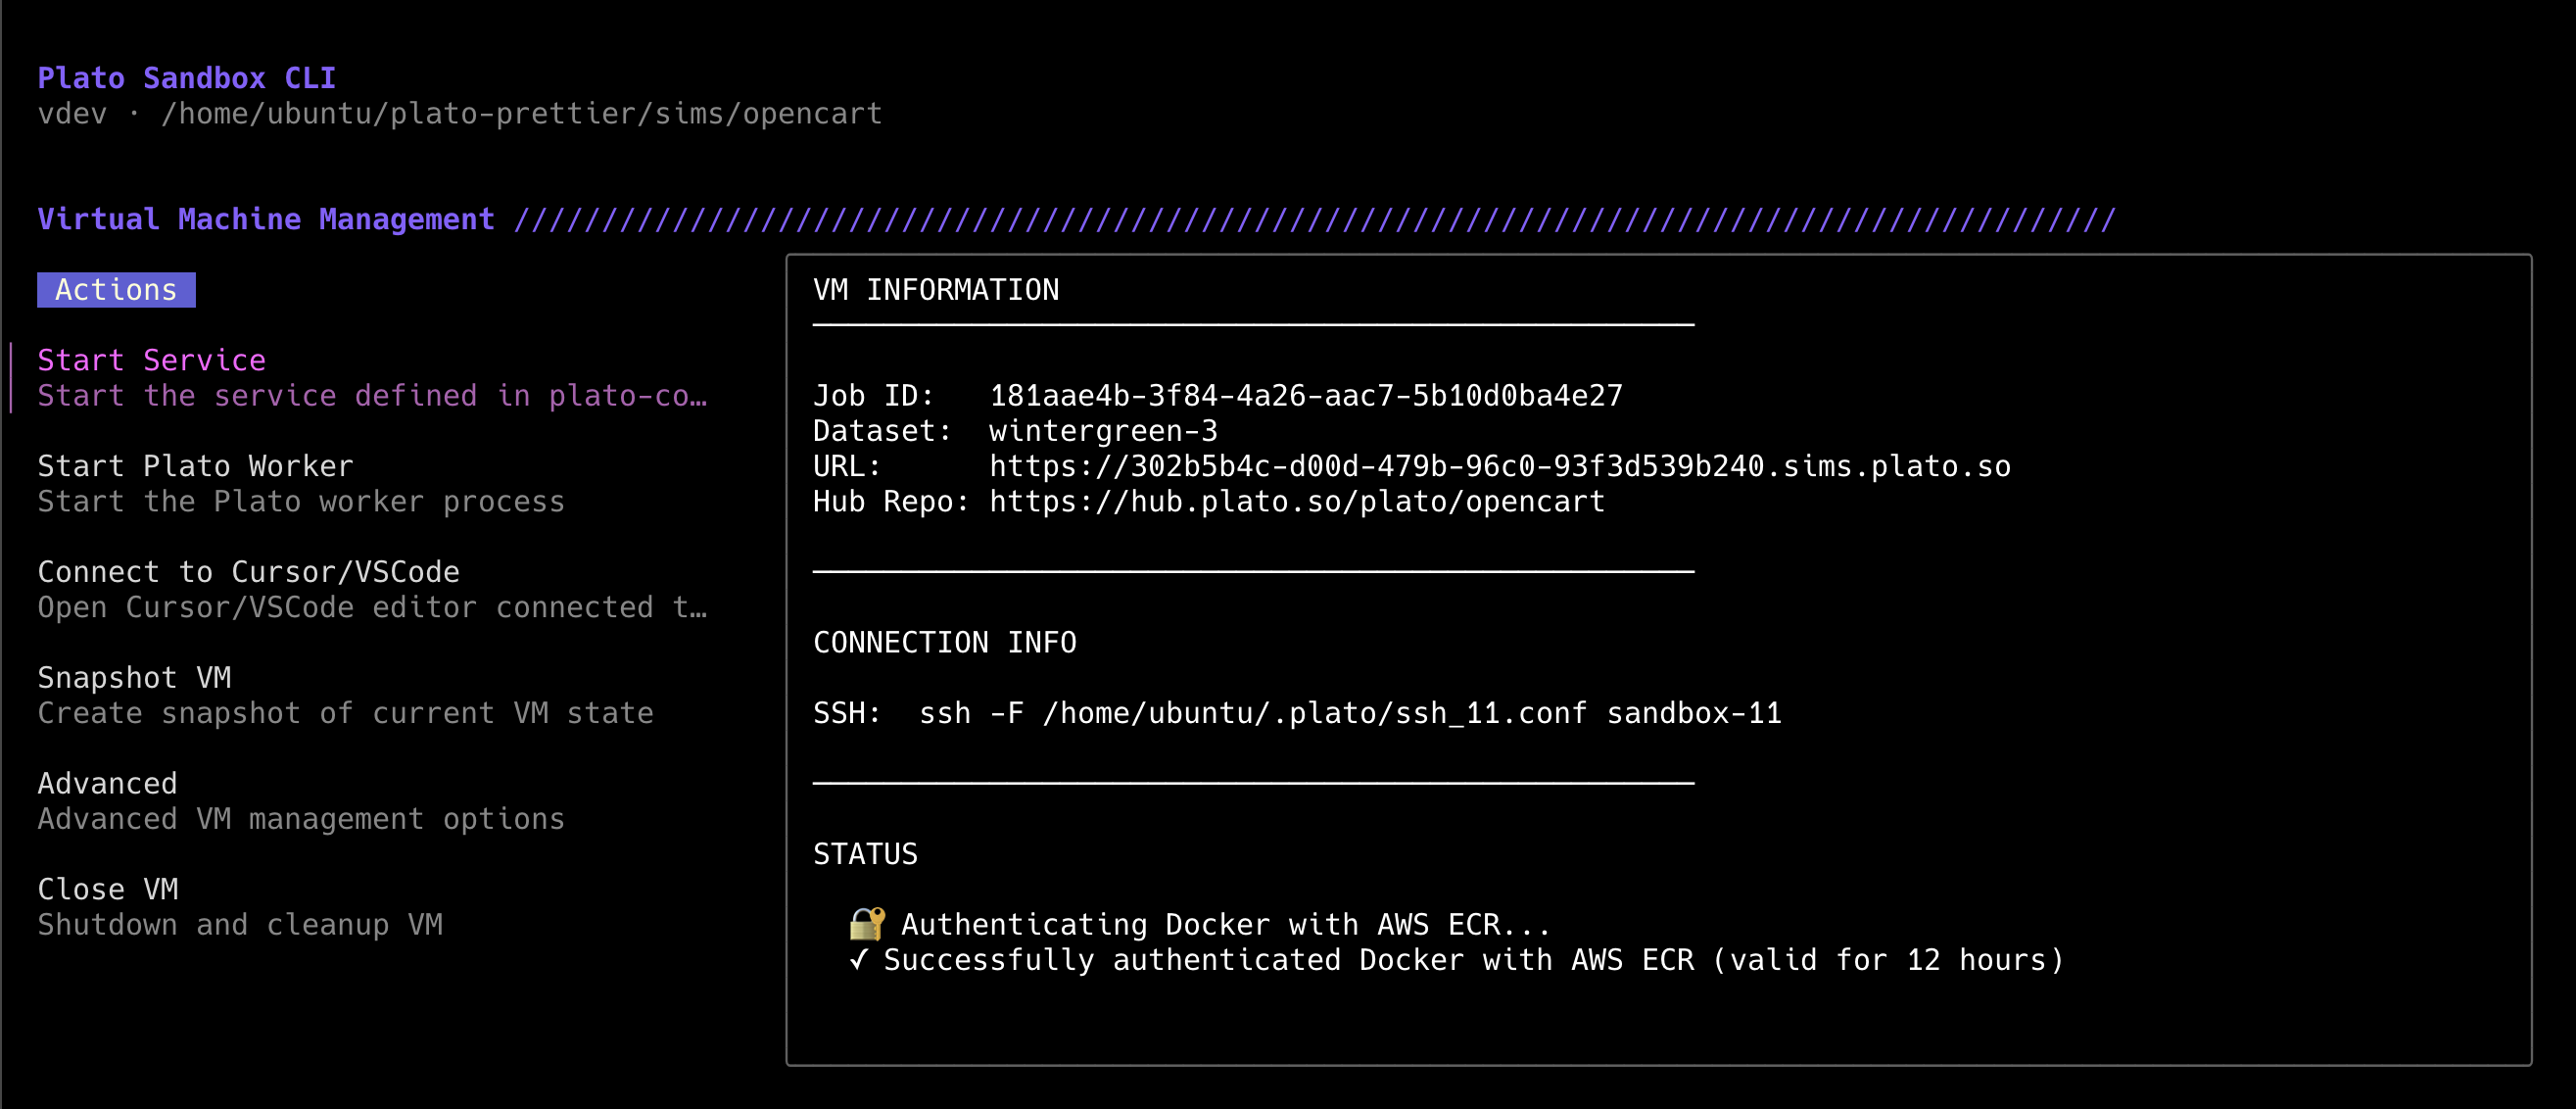
VM Information
- Job ID - Unique identifier for the VM
- Dataset - Which dataset is running
- URL - Public URL to access your running simulator (https://sims.plato.so/…)
- Hub Repo - Git repository URL
Connection Info
- SSH Command - Direct SSH access to the VM
Status
Real-time status updates showing:- Docker authentication status
- Service startup progress
- Health check results
Available Actions
1. Start Service
Starts the service defined in your plato-config.yml:- Reads service configuration from
plato-config.yml - Launches Docker Compose services
- Waits for required containers to be healthy
- Shows progress and health status
2. Start Plato Worker
Starts the Plato worker process for mutation tracking:- Connects to database listeners defined in
plato-config.yml - Monitors database changes in real-time
- Enables state tracking for snapshots
3. Connect to Cursor/VSCode
Opens your preferred code editor connected to the VM via SSH:- Passwordless access using SSH keys
- Direct file editing in the VM filesystem
- Terminal access within your editor
- Remote debugging capabilities
- Select your editor (Cursor or VSCode)
- Editor opens with remote connection
- Edit code directly on the VM
- Changes take effect immediately
4. Snapshot VM
Creates a snapshot of the current VM state:- Captures entire VM disk state
- Includes all running services and data
- Generates a unique artifact ID
- Snapshot can be used to launch new VMs
- Services are running and healthy
- Plato worker is running
- You’ve tested the simulator works correctly
5. Advanced Options
Advanced VM management features: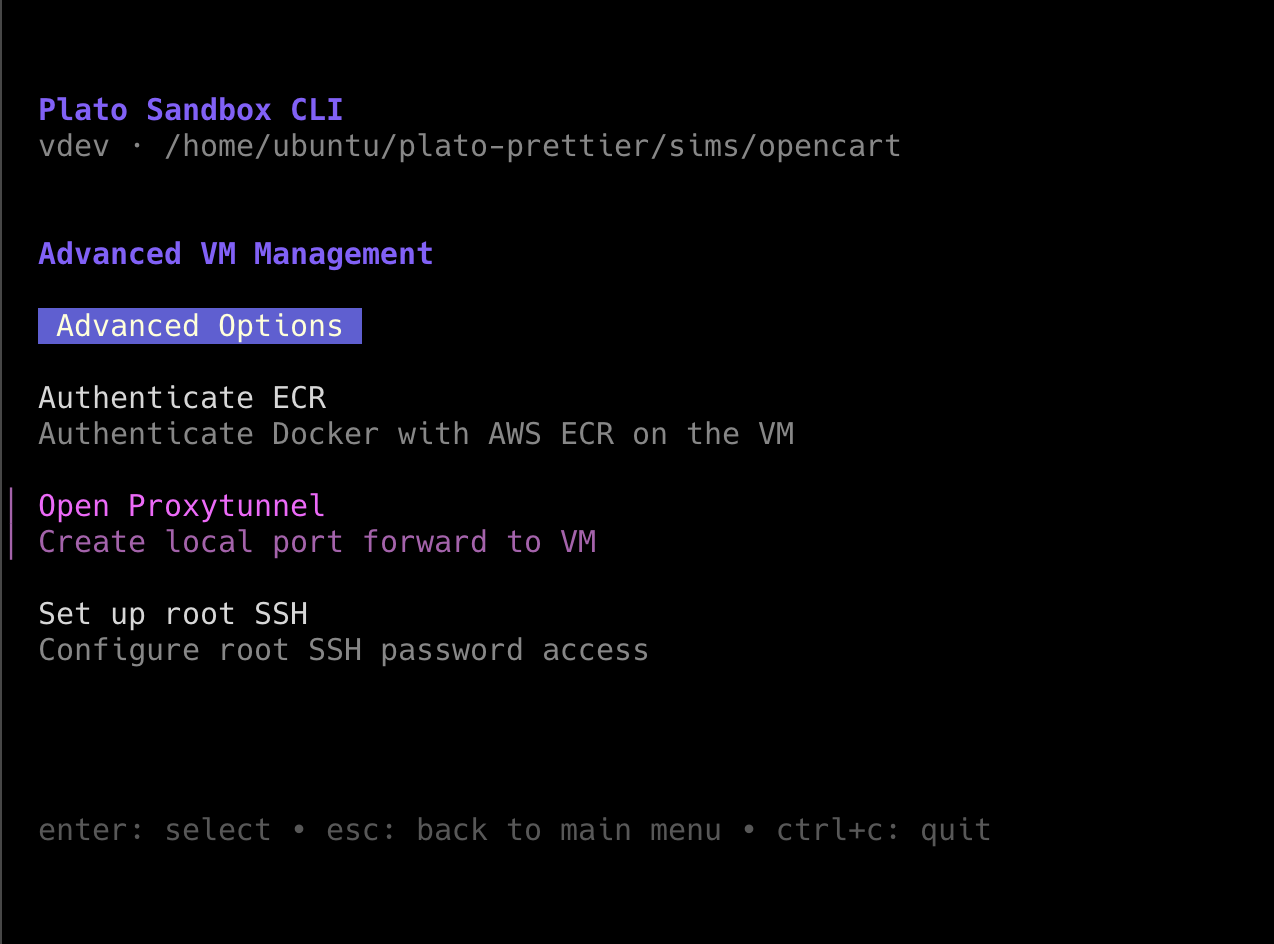
Authenticate ECR
Authenticates Docker with AWS ECR on the VM:- Required for pulling private Docker images from ECR
- Authentication valid for 12 hours
- Automatically handles credentials
Open Proxytunnel
Creates a local port forward to a VM port:- Forwards VM port to your localhost
- Useful for debugging APIs locally
- Access VM services from your development machine
- Database debugging (forward port 5432 to localhost)
- API testing (forward app port to localhost)
- Direct service access without public URL
6. Close VM
Shuts down and cleans up the VM:- Stops all running services
- Releases VM resources
- Cleans up SSH configuration
Development Workflow
Typical Development Session
1
Launch VM
Create VM from plato-config.yml or existing artifact
2
Start Services
Select “Start Service” to launch your applicationWait for all containers to be healthy
3
Start Worker
Select “Start Plato Worker” to enable mutation trackingWait for worker to be healthy
4
Test & Develop
- Access simulator at the provided URL
- SSH into VM for debugging
- Connect editor for code changes
- Use proxytunnel for local debugging
5
Create Snapshot
Once everything works, select “Snapshot VM”This creates an artifact you can resume from later
6
Close VM
When finished, select “Close VM” to clean up
SSH Access
Use the provided SSH command to access the VM:File Locations in VM
/opt/plato
Your simulator code (synced from repository)
/home/plato
Plato data (db_signals, logs, etc.)
Configuration Examples
Example Configuration
Here’s a complete example of aplato-config.yml file with detailed comments:
plato-config.yml
Multiple Datasets with YAML Anchors
Use YAML anchors (&, *, <<:) to share configuration across datasets:
plato-config.yml
Using Different Datasets
The CLI will prompt you to select a dataset if multiple are defined in plato-config.yml.Troubleshooting
VM fails to start
VM fails to start
Check your
plato-config.yml for valid resource limits:- vCPUs: 1-8
- Memory: 512-16384 MB
- Disk: 1024-102400 MB
Services won't start
Services won't start
- Check your
docker-compose.ymlsyntax - Verify image names and tags are accessible
- Review service dependencies and health checks
- Check Docker logs via SSH
- Authenticate with ECR if using private images (Advanced menu)
SSH connection fails
SSH connection fails
- Wait a moment for chisel tunnel to establish
- Try the SSH command manually from the CLI output
- Check if SSH key was generated properly in
~/.plato/
Editor won't connect
Editor won't connect
- Ensure you have the
codecommand installed and bound to VSCode or Cursor - Install VS Code Remote-SSH extension
- Use the SSH config path shown in the CLI
- Check that the SSH tunnel is active
- Try connecting manually with the SSH command first
Snapshot fails
Snapshot fails
- Ensure services are running and healthy
- Verify Plato worker is running
- Check you have sufficient disk space
- Review service logs for errors
Proxytunnel connection issues
Proxytunnel connection issues
- Ensure the VM port is accessible
- Check no local service is using the same port
- Verify the service is running on that port in the VM
Next Steps
- Getting Started - Learn the basics of Plato Hub
- Quickstart - Quick start guide with examples
- Simulator Management - Clone and manage simulators